Individual Molten Chocolate Lava Cakes
Oh, molten chocolate lava cakes! Just saying the words makes my mouth water. There’s something so incredibly magical about that warm, gooey chocolate center that just oozes out when you cut into the cake. And the best part? You can totally nail that perfect, rich chocolate cake with a molten surprise right in your own kitchen. Honestly, the first time I made these, they were for a dinner party, and I was so nervous about getting that lava center just right. But when everyone took their first bite and that chocolate goodness flowed out, it was pure bliss! Trust me, these individual molten chocolate lava cakes are a total showstopper.

Why You’ll Love These Individual Molten Chocolate Lava Cakes
Seriously, what’s not to love? These little cakes are:
- Super Quick! You can whip them up from start to finish in under 30 minutes – perfect for a last-minute craving.
- Decadently Delicious: We’re talking rich, deep chocolate flavor with that amazing, warm, gooey center that just melts in your mouth.
- Impressive Presentation: They look so fancy and elegant, like something you’d get at a fancy restaurant, but they’re so easy to make!
- Perfect for Any Occasion: Whether it’s a romantic dinner for two, a special celebration, or just treating yourself, these cakes are always a hit.
Gather Your Ingredients for Individual Molten Chocolate Lava Cakes
Alright, let’s get our mise en place ready! For these amazing individual molten chocolate lava cakes, you’ll need just a few simple things. Make sure you have:
- 1/2 cup (that’s one stick!) of unsalted butter, plus a little extra for greasing the ramekins.
- 6 ounces of good-quality bittersweet or semisweet chocolate, chopped up nice and fine. This is where the magic starts!
- 2 large eggs, and trust me, having them at room temperature makes a difference!
- 2 extra large egg yolks – these guys are key for that super rich, gooey center.
- 1/4 cup of granulated sugar.
- Just a pinch, 1/4 teaspoon, of salt to balance all that chocolatey goodness.
- 2 tablespoons of all-purpose flour. I like to sift it, but it’s not a deal-breaker if you don’t!
Using good ingredients really does make these cakes sing. The quality of your chocolate, especially, will totally change the flavor. And don’t skip those extra egg yolks; they’re like liquid gold for that luscious, molten texture we’re aiming for!
Ingredient Notes and Substitutions for Individual Molten Chocolate Lava Cakes
When it comes to chocolate, quality really is king here. I find that using a good bittersweet or semisweet chocolate bar that you chop yourself gives the best flavor and melts so beautifully. If you can’t find a bar, good quality chocolate chips will work in a pinch, but try to avoid the ones with stabilizers if you can, as they might not melt as smoothly. For more on chocolate types, you can check out this guide to chocolate.
As for flour, all-purpose is perfect, but if you wanted to get fancy, you could try a gluten-free blend, though I haven’t tested it much myself. The most important thing is that the chocolate and butter melt together seamlessly to create that glorious base.
Choosing the Right Chocolate
For that deep, rich flavor, I really recommend chocolate with at least 60% cocoa solids. If you go much higher, say 70% or more, the flavor will be more intense and less sweet. It’s all about finding that perfect balance for your taste buds!
The Simple Steps to Baking Individual Molten Chocolate Lava Cakes
Okay, so now that we’ve got all our goodies gathered, let’s get down to the fun part – actually making these beauties! It’s really not complicated, I promise. Just follow these steps and you’ll be enjoying warm, gooey chocolate lava cakes in no time.
- First things first, get that oven preheating to 425°F (that’s 220°C). While it’s warming up, let’s get our little ramekins ready.
- Grab your butter and that chopped chocolate. Pop them into a small saucepan over low heat. Stir them gently until everything is melted and super smooth. Then, take it off the heat and let it cool down just a bit so it doesn’t scramble our eggs.
- In a separate bowl, whisk together those whole eggs, the extra egg yolks, sugar, and salt. Just whisk until it’s all combined and looks nice and smooth.
- Now, slowly drizzle that slightly cooled chocolate mixture into the egg mixture while whisking. Keep whisking until it’s all one beautiful, smooth chocolatey color.
- Gently, and I mean gently, fold in the flour. You just want to mix it until you don’t see any dry streaks. Seriously, don’t overmix here, or your cakes might get tough!
- Divide the batter evenly among your prepared ramekins. I usually just eyeball it, but if you want to be precise, a measuring cup helps.
- Pop the ramekins onto a baking sheet – this makes them easier to move in and out of the oven. Bake for about 12 to 14 minutes.
- The edges should look set, like a normal cake, but the very center should still be a little soft and jiggly. That’s your cue!
- Let them cool in the ramekins for just one minute – no longer! Then, carefully flip each ramekin onto a serving plate.
- Lift the ramekin off super carefully. If you greased and floured them well, they should slide right out!
Preparing Your Ramekins
This step is SO important, you guys! Don’t skip it. You really need to butter those ramekins generously, getting into all the nooks and crannies. Then, a light dusting of flour, tapping out any extra. This is your insurance policy against those gorgeous cakes sticking!
Mastering the Batter
When you’re melting the butter and chocolate, low and slow is the way to go. You don’t want to scorch that chocolate, right? Once it’s melted and smooth, letting it cool slightly is key. And when you fold in the flour, treat it gently! We’re not making bread here; we want a tender cake, so just mix until it’s combined. No need to go crazy with the whisk!
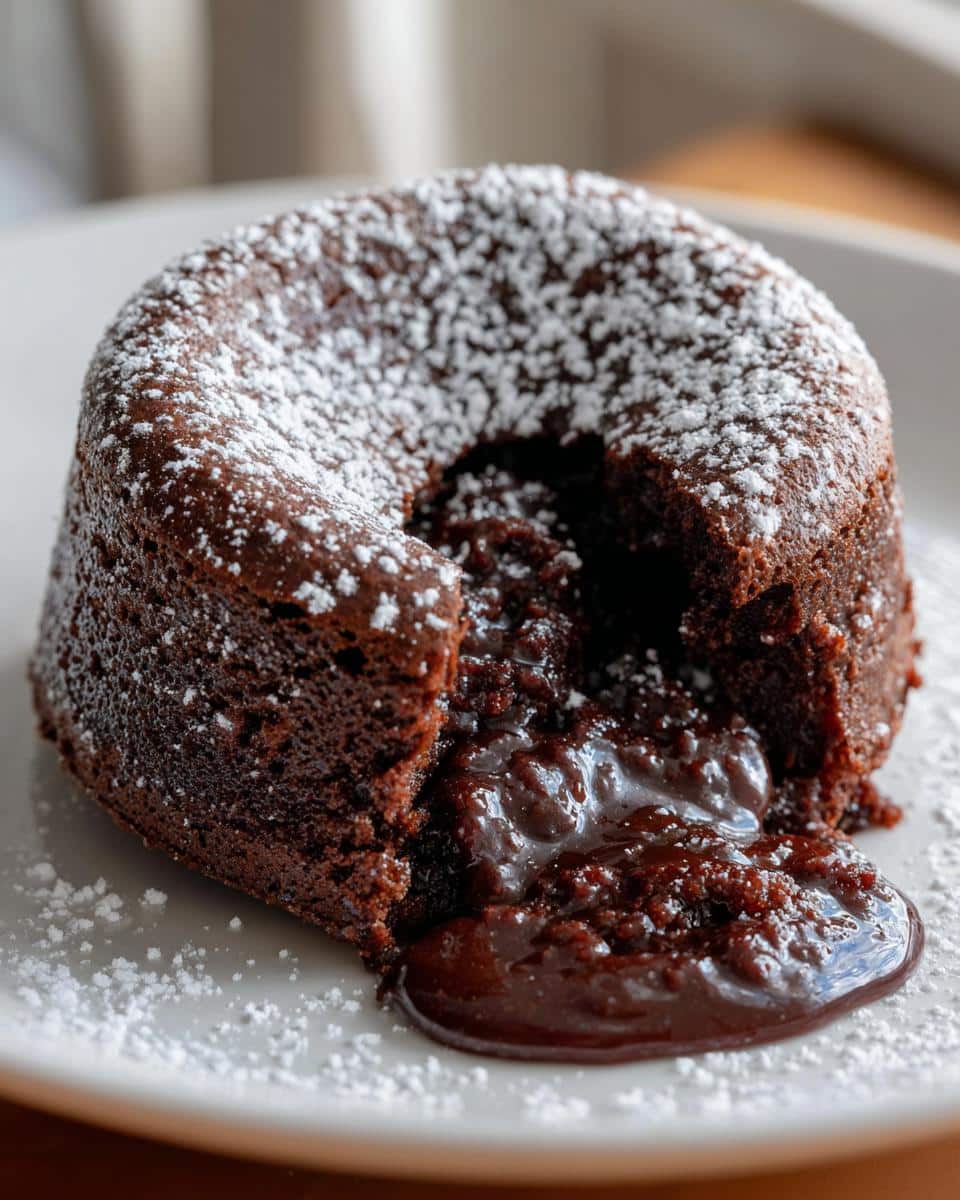
Achieving the Perfect Gooey Center
This is where the magic happens, and it’s all about timing! Those 12-14 minutes are crucial. You’re looking for the edges to be set and slightly firm, but when you gently tap the side, the center should still be a bit wobbly. It looks underbaked, but trust me, that’s exactly what you want! The residual heat will finish cooking it as it cools for that perfect molten flow.
Tips for Success with Individual Molten Chocolate Lava Cakes
Okay, so you want these little chocolate bombs to be perfect every time, right? My biggest tip is: DON’T OVERBAKE THEM! Seriously, this is the most crucial part. You want those edges set, but the middle should still be a little jiggly. A gentle tap on the side of the ramekin is your best friend here. If it feels firm all the way through, you’ve gone too far and will lose that glorious molten center.
Also, using good quality chocolate makes a HUGE difference. You can really taste the difference when you use a nice bittersweet bar instead of just any old chips. And remember to butter and flour those ramekins really well – it’s the secret to getting them out perfectly without breaking!
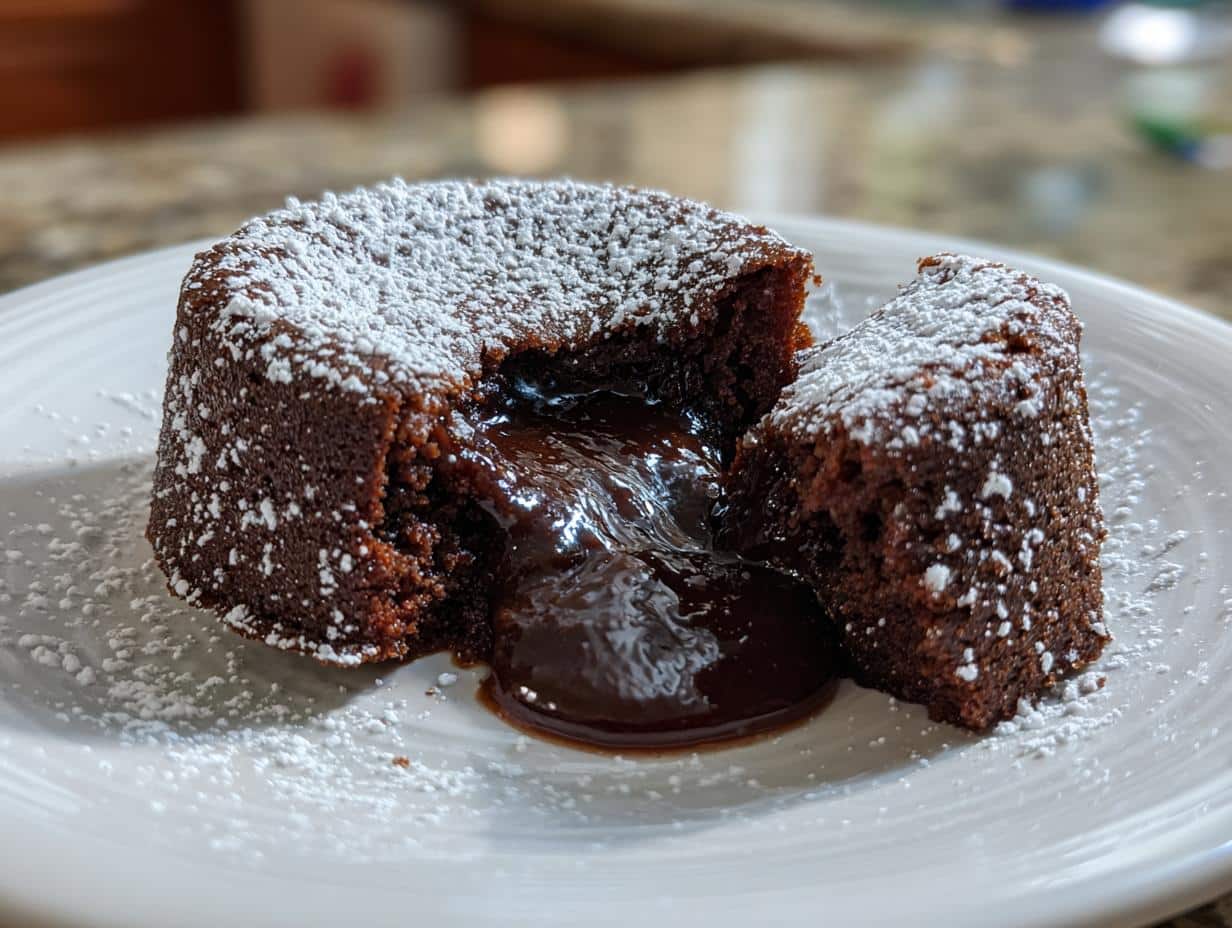
Serving and Presentation Ideas
These individual molten chocolate lava cakes are practically begging to be dressed up! A simple dusting of powdered sugar right before serving looks so elegant. Or, go all out with a dollop of freshly whipped cream and a few bright raspberries on the side – the tartness of the berries is just divine against the rich chocolate. Honestly, they’re so good, they don’t need much else, but these little touches really make them feel extra special! For more dessert inspiration, check out these delicious dessert recipes.
Storing and Reheating Leftovers
If, by some miracle, you have any leftover molten chocolate lava cakes, don’t worry! You can store them in an airtight container in the refrigerator for up to two days. To reheat and get that gooey center back, pop them in the microwave for about 10-20 seconds. Just be careful not to overheat them, or you’ll lose that lovely molten magic!
Frequently Asked Questions About Individual Molten Chocolate Lava Cakes
Got questions about these decadent little desserts? I’ve got answers! Let’s dive into some common queries about making the perfect individual molten chocolate lava cakes.
Q: Can I make the batter ahead of time?
Yes, you totally can! You can prepare the batter and store it in the buttered and floured ramekins in the fridge for up to 24 hours. Just cover them tightly. When you’re ready to bake, take them out of the fridge and let them sit for about 10 minutes before popping them into the preheated oven. You might need to add a minute or two to the baking time since they’ll be starting out cold.
Q: What if my lava cakes don’t have a molten center?
Oh no! This usually happens if they’re overbaked. The key is to watch them closely. You want the edges to be set, but the very middle should still look a little soft and jiggly. It honestly looks slightly underdone, but trust me, that’s what you’re going for! The residual heat will finish cooking it perfectly in the ramekin.
Q: Can I use different types of chocolate?
Absolutely! While I love bittersweet or semisweet for that rich chocolate flavor, you can experiment. Milk chocolate will be sweeter and might need a little less sugar in the batter. White chocolate is a bit trickier because it can burn more easily, so I’d be extra careful with the heat if you try that. Just remember, the better the chocolate, the better your molten lava cake will taste!
Q: How do I know when they are done baking?
This is the big one! You’re looking for the edges of the cake to be firm and look set, like they’re pulling away just slightly from the sides of the ramekin. But when you gently touch the center, it should still feel soft and a little wobbly. If you poke it with a toothpick, it should come out with wet, gooey batter clinging to it, not clean. That’s your sign they’re ready for that glorious ooze!
Estimated Nutritional Information for Individual Molten Chocolate Lava Cakes
Just a heads-up, these numbers are estimates, okay? The exact nutritional info can totally change depending on the specific brands of chocolate and butter you use, and if you add any extra toppings. But generally, one of these decadent little lava cakes has about:
- Serving Size: 1 cake
- Calories: 450
- Fat: 30g
- Carbohydrates: 40g
- Protein: 7g
They’re definitely a treat, but so worth it! For more baking tips, you can explore the cakes section of our site.
Print
Individual Molten Chocolate Lava Cakes: 1 Secret
- Total Time: 29 minutes
- Yield: 4 servings 1x
- Diet: Vegetarian
Description
Individual Molten Chocolate Lava Cakes are decadent, single-serving desserts featuring a rich chocolate cake exterior with a warm, gooey chocolate center.
Ingredients
- 1/2 cup (1 stick) unsalted butter, plus more for greasing
- 6 ounces bittersweet or semisweet chocolate, chopped
- 2 large eggs
- 2 large egg yolks
- 1/4 cup granulated sugar
- 1/4 teaspoon salt
- 2 tablespoons all-purpose flour
- Powdered sugar, for dusting (optional)
- Fresh raspberries or whipped cream, for serving (optional)
Instructions
- Preheat your oven to 425°F (220°C). Butter and lightly flour four 6-ounce ramekins.
- In a small saucepan over low heat, melt the butter and chopped chocolate together. Stir until smooth. Remove from heat and let cool slightly.
- In a medium bowl, whisk together the eggs, egg yolks, granulated sugar, and salt until well combined.
- Gradually whisk the slightly cooled chocolate mixture into the egg mixture until smooth.
- Gently fold in the flour until just combined. Do not overmix.
- Divide the batter evenly among the prepared ramekins.
- Place the ramekins on a baking sheet. Bake for 12-14 minutes, or until the edges are set but the center is still soft.
- Let the cakes cool in the ramekins for 1 minute. Invert each ramekin onto a serving plate.
- Carefully lift off the ramekins. Dust with powdered sugar, if desired, and serve immediately with raspberries or whipped cream.
Notes
- For a deeper chocolate flavor, use bittersweet chocolate with a higher cocoa content.
- Do not overbake, or you will lose the molten center.
- The cakes can be made ahead of time and refrigerated. Bake them just before serving, adding a few extra minutes to the baking time.
- Prep Time: 15 minutes
- Cook Time: 14 minutes
- Category: Dessert
- Method: Baking
- Cuisine: French
Nutrition
- Serving Size: 1 cake
- Calories: 450
- Sugar: 30g
- Sodium: 150mg
- Fat: 30g
- Saturated Fat: 18g
- Unsaturated Fat: 12g
- Trans Fat: 0.5g
- Carbohydrates: 40g
- Fiber: 4g
- Protein: 7g
- Cholesterol: 150mg
Keywords: Molten Chocolate Lava Cakes, chocolate cake, individual dessert, gooey center, lava cake, rich chocolate